Recording screencasts with OBS.
I recently wanted to capture a screencast of my workstation. I used OBS, and wanted to share the experience, as it was surprisingly easy and comfortable.
Why would anyone want to record his screen/audio?
Well, for a number of reasons.
- To livestream his gaming or coding sessions (or bootleg sports channels)
- To create gaming montages or training material
- To record workflows and find ways to automate it
- To record your DnD session or a podcast.
My specific goal was to record and take notes for some long calls. I’ve found that it helps to improve your public speaking while providing an easy way to keep track of things you’d otherwise miss in hours-long sessions.
Note : If you’re recording your calls, the polite thing is to make sure to notify the other party about this beforehand.
Windows 10 does have native screen recording (XBox Game Bar/XBox DVR or something?), which should be accessible by Win+G. Unfortunately, when setting up my laptop, I had removed most of the default bloat, and I wasn’t so keen on adding it back.
OBS
OBS (short for Open Broadcaster Software) is one of these cases of FOSS done right; a multiplatform Open Source solution so good that it became the industry standard and has helped grow a healthy ecosystem around it. Kudos Jim!
It’s available for Windows, Mac and Linux, and the C/C++ GPL codebase is available on GitHub. Personally, I am more than happy with the performance, the stability, the clean and unobtrusive UI.
I had used OBS way back in 2015 to livestream CS:GO Tournaments on Twitch I organized as part of a previous gig, but I don’t even remember the layout, so I came in with a fresh outlook.
OBS Profiles - My setup
I have two basic setups I’d want to acommodate
- A single 4K screen
- A pair of 1080p screens
For this reason, I created two different profiles, Dock and Meetings.
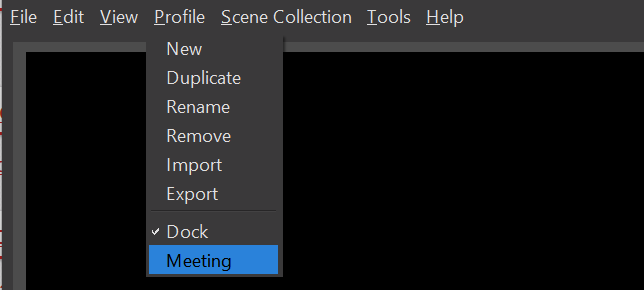
OBS Profiles do not include information about capture sources or scenes (more on that in five minutes), but group all your basic settings (rendering and recording options, hotkeys, filetypes, filenames etc) into distinct groups.
For example, in my case, I set the Dock profile to capture from a Base Canvas of 3840x2160, and enabled Push-to-Talk functionality.

On the other hand, the Meeting profile will both record and output in 1920x1080, but will require higher audio fidelity, as well as continuous sound recording. I want each profile to record screencasts with different filenames, so I can distinguish them at a glance, and 60fps is not a priority.
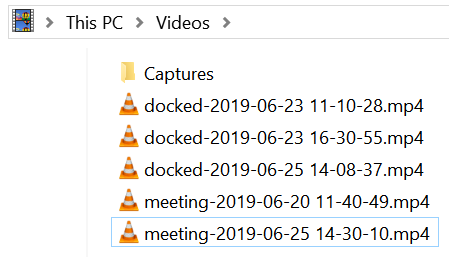
Finally, I checked the “Automatically remux to mp4” option, so that files are converted from flv to mp4 directly after finishing the recording.
Scenes and Sources
Scenes and Sources are the two main concepts that you need to understand to use OBS effectively.
OBS Scenes are nothing more than collections of sources and their layout. In any given moment, the active scene is what will be recorded or streamed, and it’s being previewd on the main OBS window.
Scenes allow you to group sources and then manipulate their layout by easily dragging, dropping and resizing them for the desired effect. For example, if I want to setup a training video, where I will have two windows side by side, and the company logo overlayed on top, this will be configured as a Scene.

Scenes can be saved, imported and exported from the Scene Collections option at the top menu, to be accessed at a later time.
OBS Sources define what is actually being captured and put into the scene layout.
A source can be your whole screen (Display Capture), a specific Window (Window Capture), a still Image, a device such as a webcam (Video Capture Device), or an arbitrary Media Source file. The default audio that is being recorded includes your computer’s microphone and speakers, but you can configure additional audio sources as well.
Souces can be re-aligned using drag-and-drop or the keyboard arrows, and sources higher in the list will overlap and appear on top of other sources. The eye and lock icon can be used to easily to show/hide sources and freeze/unfreeze their size and position.

The easiest way to work is with a “Display Capture”, but I’d recommend against it, since you might record/stream things you didn’t mean to by accident, and also you might ruin your layout and have to adjust it on the fly. Just take 5 minutes and set up a couple of scenes with their separate sources, and you’re done!
If you come accross a multi-adapter compatibility setting, leave it unchecked as it is meant for use with SLI/Crossfire GPUs.
That’s all!
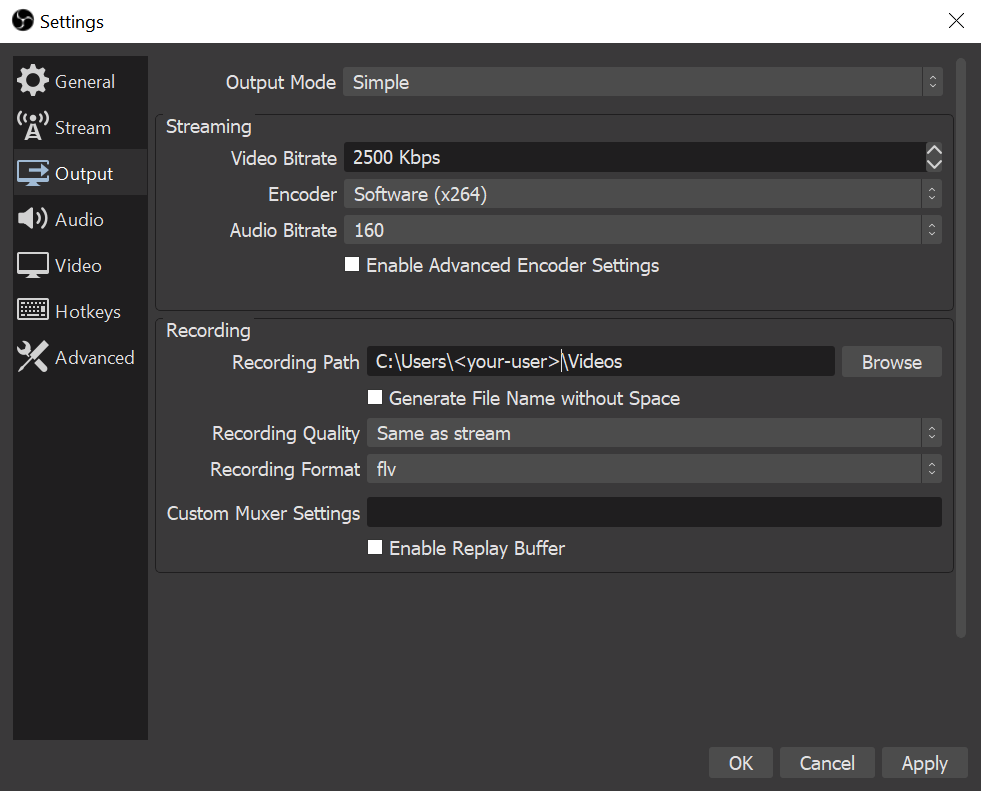
Press “Start Recording”, and the current active scene will start recording. Come back and press “Stop Recording” when you’re done. A “Pause” feature is on the table, but not available right now. The default save location can be altered from the following menu
Keep an eye on the lower right-hand side corner for the CPU utilization and FPS you’re recording at, as they can both impact the final quality.
Other features
After the first setup, one can use OBS by launching it from the command line and using the keyboard shortcuts.
Other useful features include captioning, the use of timers, automatic switching between scenes and Studio Mode to preview scene changes. There’s also a Python/Lua script API in case you want to simultaneously participate in the Twitch chat, or if you’re an artistic type, you can have fun with filters.
Let me know the setups you have come with, cool things you’ve seen other people do, or any problems you encounter.
Until next time, see ya!
References
https://github.com/obsproject/obs-studio
https://obsproject.com/wiki/OBS-Studio-Overview
https://obsproject.com/wiki/Sources-Guide
https://obsproject.com/wiki/Laptop-Troubleshooting
https://obsproject.com/wiki/Filters-Guide
https://obsproject.com/wiki/Understanding-the-Mixer